The display above is the plugin's own drawing code, running here in the page.
The first minute
| Do | What happens |
|---|---|
| Put it first on the channel | Before anything else in the chain. Its default state is numerically transparent, tested at 1e-7, so inserting it changes nothing until you move a control. |
| Play the loudest part of the track | The readout fills in: peak, RMS and the distance to your target. Give it a few seconds of real material, not a single hit. |
| Type the target you want | The tool shows the gain you need. Apply it and the difference goes to zero. |
| Flip polarity if two mics share a source | Listen to the low end. The one that sounds fuller is the one to keep. |
Reading the screen
Three numbers and one difference. Peak is the highest sample seen, RMS is the average energy over the window, and the difference is what to add or remove to land on your target.
| What you see | What it means |
|---|---|
| PEAK | The highest sample since the last reset. Clipping lives here, not in RMS. |
| RMS | Average energy over the window. This is what people mean by how loud something feels. |
| TARGET | The level you type. Everything else is measured against it. |
| DIFFERENCE | What to apply. When it reads zero you are there. |
The controls
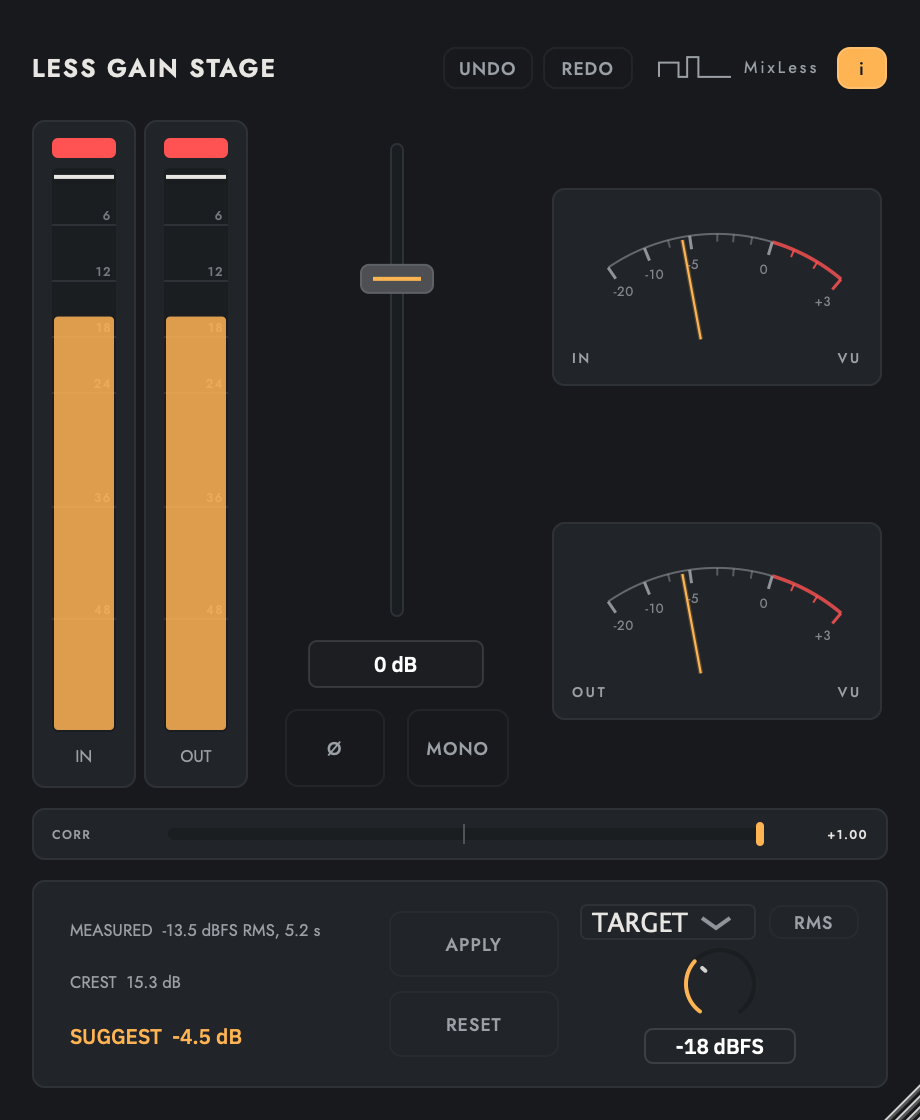
| Control | What it does |
|---|---|
| GAIN | The gain applied, in decibels. Smoothed, so moving it during playback does not click. |
| TARGET | The RMS level you are aiming for. |
| MONO | Folds the channel to mono, for checking a mix before it leaves the room. |
| POLARITY | Inverts the signal. Useful on the second mic of a pair. |
| RESET | Clears the meter's memory and starts measuring again. |
How to work with it
Set the level once, at the top of the chain, and every plugin after it sees the same signal every time. That is the whole point of the tool: not a sound, a starting position.